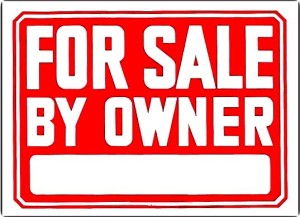
September 17th, 2015 § Comments Off on For Sale by Owner § permalink

My brilliant husband, Stacy Conaway, generously agreed to write a post on how we sold our home in Texas by ourselves, saving nearly $8,000. I’d like to reiterate that it’s a good idea to do your own research – for your own state – but in our experience, this process was relatively easy.
You can get the yard signs from your local Home Depot or hardware store. You can hold your own Open House. You can take the photos and do the staging yourself. It’s really quite simple. With a little research and elbow grease, you too could save big bucks by selling your home by owner. We spent roughly $350 to have the home listed on MLS and have a real estate lawyer review pertinent documents. That’s quite a savings!
So read on! Stacy shares lots of enlightening information on how you can get on MLS yourself and save lots of money when you sell your home!
FOR SALE BY OWNER
by Stacy Conaway
When we decided to sell the house we thought we could save quite a bit of money on Realtor fees by doing the listing ourselves (aka For Sale by Owner, or FSBO). Last summer I sold my dad’s house this way so I had a little experience to draw on. It’s not difficult if you don’t mind doing some work and you’re available to show the house yourself. We live in Texas so the practices may be different in other states.
In a typical transaction the seller pays 3% of the sale price to a listing (seller’s) agent and 3% to the buyer’s agent. This arrangement is not required by law so everything is negotiable, but that’s how it usually works. The buyer’s agent fee will be negotiable with some Realtors, but trying to reduce their fee could work against you—this is the person bringing you a buyer and you want them to be incentivized to do the job, so I didn’t even try to negotiate this fee down. If a buyer’s agent isn’t happy with a reduced fee they may just direct their clients to another home. In my experience it’s the buyer’s agent who does the majority of the work anyway, so it’s worthwhile to pay them.
The cost savings with FSBO are on the listing side. It used to be that listing Realtors had exclusive access to the Multiple Listing Service (MLS), which is where your property gets the broadest exposure to buyers and their agents. But now there are flat-fee services where you can get on the MLS for $99. This is what we did. I found a service on Google and called the owner to ask a few questions about how it worked. He explained things to me, I signed up that night, paid the fee via PayPal, and our house was on the MLS the next morning (actually on HAR.com which is the Houston Association of Realtors site, the local listing website for our area).
The way the flat-fee listing works is that once you sign up, your listing is handed off to a Realtor. If I understand it correctly, there has to be an agent of record on the listing and this person has to be a licensed Realtor. The difference in this scenario is that this Realtor doesn’t really do much other than put your property info into the MLS, and then forward buyer inquiries to you—however, it’s important to keep this Realtor in the loop when you get an offer and when you close so they can update the listing accordingly. In our case I just exchanged a few emails with the Realtor and that was the extent of our interaction.
I had a good real estate attorney that I worked with, and he was a HUGE help. He advised me on the process, offered suggestions on negotiating with buyers, and reviewed documents for me. I highly recommend having someone like this in your corner. Your situation may be different but my cost for this attorney’s time on our house sale was $225. (Last year I used the same lawyer on my dad’s house sale and his bill for that was $250.) I would have gladly paid twice as much, or more, considering the overall value of having an experienced real estate attorney watching out for our interests and guiding me through the process.
Once the house was listed on HAR.com we started getting calls right away. We showed the house a few times and after one showing I immediately got a text from the buyer’s agent saying they loved the house and would be submitting an offer the next morning. What I received the next day was a standard contract of sale with their pricing offer written in. It was lower than our asking price, and lower than what we were willing to accept, so I responded to the agent with our counter offer and they quickly accepted. It made we wonder if we had left some money on the table, but there’s no way to know at this point and we were satisfied with the terms, so it was fine. We were just glad to have a reasonable offer and get on with things. Negotiation is an art, and I don’t know much about it except to say that if you are satisfied with the deal, consider it a good one and move on.
The next step was the buyers hiring an inspector (their cost) to come and check everything out and make sure there were no serious issues with the property. I think the big concern here is with major things like the roof, air conditioners, foundation, electrical, plumbing—big things that could be very costly to remediate. The inspector’s report noted a few minor things, and the buyers asked that we address some of those, but not all of them. We complied on all but one thing on their list and they accepted. This is a negotiable area too, but if the buyers are not satisfied with your response they can still back out within the option period, so it’s good to accommodate them as much as you can.
One of the first things you will want to do before you put a sign in the yard or do your MLS listing is to complete a Sellers Disclosure document. This is a standard form that you can download from the internet. It provides a lot of basic information about the property that any buyer will want to know. A buyers agent will likely ask for this right away so it’s good to have it ready.
There’s more I could say about doing FSBO but those are the key things, just from my limited personal experience. You will certainly want to do your own homework on this, but for us it was easily worth the time and effort to save the $7,650 we would have paid a listing agent.
One thing I want to be clear about is that this is not a criticism of Realtors, or the listing agent relationship specifically. I think that for many people it can be very valuable to just hand things over to an agent and let them work for you, especially if you don’t have the time or inclination to do some of these things yourself. But if your circumstances are anything like ours, I think it’s worth your time to investigate whether FSBO could help you keep a good bit of cash in your pocket at closing time.
________________________________________________
So there you have it. Pretty simple, huh? To review:
- Download a generic Sellers Disclosure and fill it out
- Search Google for a Flat Rate Listing Agent and pay your fees to get on MLS
- If you prefer (and we advise) contact a Real Estate Attorney to review Documents
- Set appointments with Realtors to show the home.
- Negotiate price when you receive a contract
- Allow Inspectors and appraisers (hired by the buyer) to inspect your home
- Negotiate any repairs the buyer might request
- The buyers agent will set up the closing date
- Close on the home and enjoy the savings!
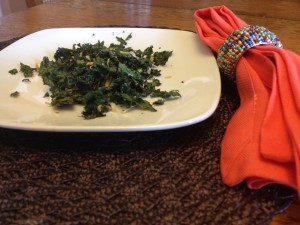
August 4th, 2014 § Comments Off on Parmesan Kale Chips § permalink
 Want a quick and healthy snack?
Well, I’ve got one for you and it’s so simple and so easy it will satisfy your munchies in a snap and will help you get that dose of cruciferous veggies in a very satisfying way – no problem.
Kale is chock full of vitamins and minerals.  Webmd.com has this to say about kale:
One cup of chopped kale contains 33 calories and 9% of the daily value of calcium, 206% of vitamin A, 134% of vitamin C, and a whopping 684% of vitamin K. It is also a good source of minerals copper, potassium, iron, manganese, and phosphorus.
Pretty good for a cup of kale if you ask me. I’ve prepared kale all sorts of ways – raw, sautéed with bacon, steamed, in salads; but this recipe is by far the easiest and tastiest way to serve it. My kids even love it and that’s saying a lot!
So how do you make them? Simple. . .
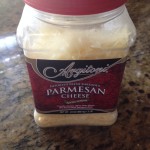
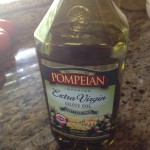
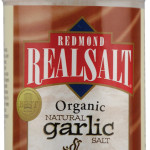
Grab your olive oil, garlic salt, parmesan and of course a big bunch of kale.
Preheat your oven to 350° F.
Cut your kale into bite sized pieces, removing the stem.

Toss it in a bowl with about 1 Tablespoon of olive oil, a sprinkle of garlic salt and a handful of parmesan.
Dump all of it onto a baking tray.
Bake for about 10 to 15 minutes, turning once during cooking time, until crisp.
Voilà !  You’ve got Parmesan Kale Chips to enjoy in about 15 minutes.
A bit of advice: Buy two bunches of kale. The likelihood that you will be making another batch of these in a few minutes is HUGE. Just trying to save you another trip to the grocery store!
Enjoy. . .
Â
Â
July 29th, 2014 § Comments Off on A Little Bit Greener – Letting Go of Paper Towels § permalink
 I was inspired recently to live just a little bit greener.
Many years ago, I felt overwhelmed by the prospect of living a totally green lifestyle. I used cleaners and detergents that had all kinds of fillers and chemicals in them. I had no idea how to maintain a garden. I used paper products and didn’t recycle. It felt a bit overwhelming to change habits that I had grown up with. But one day, I realized that all I had to do was start with one thing.
Years later, those “one things” have turned into many things. I recycle, I garden, I make a lot of my own cleaners and detergent. Those little changes have morphed into big lifestyle transformations. My family is living a much greener lifestyle. I feel a little more connected to the earth. And I just added “one more thing” to the list.
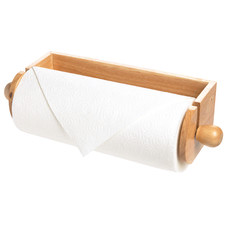
PAPER TOWELS
I visited a friend recently who doesn’t use them. We ate. We cleaned. We created all kinds of things in her kitchen – ALL without using paper towels. It may seem silly, but I was genuinely astonished that you could live, cook and clean without grabbing a paper towel at every turn.
When I came home, I began to notice how many of these tree killing, carbon dioxide producing towels we mindlessly went through every day. I bought the giant sized package every two weeks, using them for everything from drying our hands to cleaning up dog vomit from the floor. When I became conscious of how many we were using, I talked to the family and we made the decision to quit buying them.
Instead of buying the bulk sized paper towel bundle, I bought cloth napkins and kitchen towels. I gathered up all our old rags and created a community of them underneath our kitchen sink for cleaning up the nastier messes.
It was working well. We were doing it! But to my dismay, we were creating more laundry. No one wanted to use the same napkin twice because we could never quiet decipher who’s napkin was who’s. So they went to the laundry each time. I was diligent  in keeping them washed, but knew we needed a better solution.
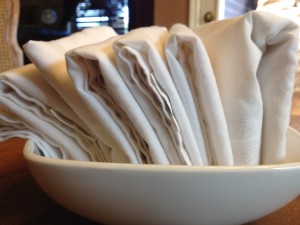
Then I visited another friend. I was helping her unpack some boxes and saw that she had some beautiful napkin rings. This wasn’t a matching set, but several  uniques rings – not one of them the same as the other. My friend told me that she put them all in a pile and had each family member choose one for the week. That way, they could always put their slightly used napkin back into the napkin ring until it was dirty enough for the laundry.
 I took the family the next day and let everyone pick out their favorite napkin ring. We bought some brightly colored cloth napkins and came home and set our places with our new table attire. It truly personalized our table and helped us to be more mindful about throwing things into the laundry that might not really need washing. Better for me. Better for the earth.
We’ve lived a whole month without buying paper towels. My hope is that this month will turn into two months and then a year and then years. It’s a small thing, but it makes me feel so much better when I’m being nice to the earth.

What’s “one thing” you can change in your daily life to live a bit greener and feel more connected to the earth? Can you challenge yourself to make the change and see how it goes? Who knows, it might be easier than you think!
If you’ve made a change that’s impacting the earth in a good way, please let me know about it. I’m always looking for that next “one thing” I can add to my list.
Â
Â
May 9th, 2013 § Comments Off on Beer Battered Onion Rings § permalink

These are about the best onion rings I’ve ever had. I don’t fry things very often, but since we just harvested 25 lb. of onions from our garden, onion rings came to mind, so off I went to the kitchen with two of them to experiment.
The results were awesome! I hope you might enjoy them too.
Ingredients
2 large white onions
4 cups all purpose flour
2 tsp salt
4 tsp baking powder
2 tsp. garlic powder
2 tsp paprika
1 tsp onion powder
1/2 tsp cayenne pepper
2 cups beer
Oil for frying

Instructions
Slice onions and separate into rings. Mix flour and all other dry ingredients in a bowl.
Toss onions in one cup of the flour mixture to coat.
Mix the rest of the “dry” mixture with the beer to make a batter.
Heat oil to about 375 degrees in a large cast iron skillet.
Dip each ring into the batter and fry in hot oil. Watch carefully because they cook quickly. When you see the upper side of the batter bubbly, it’s time to turn them.
Transfer with tongs to a paper towel lined platter. Sprinkle with salt and pepper and serve.


April 29th, 2013 § Comments Off on Old Fashion White Bread § permalink
When I make bread, I usually try to use whole wheat. But on this rainy day I decided to look for a recipe that called for white flour to go with our hot steamy stew I made for dinner.
My grandmother left me all of her cookbooks and recipes because I took after her love of cooking and baking In the stack I found a very old Betty Crocker cook book and found this recipe.
So when you’ve got a hankering for some good old fashioned white bread, whip this recipe up. It’s fairly easy and taste oh so delicious.
Ingredients
6 – 7 cups of All Purpose White Flour
3 TBL sugar
1TBL salt
4 1/2 tsp yeast (or 2 pkgs)
2 TBL Shortening
2 1/4 Cups very warm water (120 to 130 degrees)
Mix 3 1/2 cups of the flour, the sugar, salt shortening and yeast in a large bowl. Add warm water. Beat on low, scraping bowl frequently, 1 minute. Beat on medium speed, scraping bowl frequently, 1 minute. Stir in enough remaining flour, 1 cup at a time, to make dough easy to handle.
Turn dough onto lightly floured surface. (I just used my kitchen aid for this but you can hand knead if needed) and knead until smooth and elastic, about 10 minutes. Place in a well greased bowl, turning greased side of dough up and cover with a cloth. Place in a warm spot in your kitchen and let rise for 40 to 60 minutes or until doubled.
Punch down the dough and divide into halves. Let rest for 5 minutes. Flatten each half with hands or rolling pin into rectangle, 18 x 9 inches, on lightly floured surface. Fold into thirds and place, seam side down, into 2 greased loaf pans. Brush lightly with butter if desired.
Place in a warm place and let rise 35 oto 40 minutes or until doubled in size.
Heat oven to 425 degrees. Place loaves on low rack in oven. Bake until golden brown, about 25 to 30 minutes.
Remove from pans and cool on a wire rack. Serve with real butter.