November 27th, 2012 § Comments Off on DIY Laundry Detergent § permalink

Slowly but surely I have been learning to make my own cleaners so… I will be filling my DIY category with everything I’ve tried that has worked and sharing it with you . Â My first entry will be Laundry Detergent, so here goes.
I LOVE this laundry detergent! Â It’s simple to make and has cleaned EVERY stain that my two boys can challenge me with. Â Red wine stains, grape juice stains, grass stains, you name it…this detergent has cleaned it.
Since you use only about a Tablespoon per load, it last a very long time. Â With six people living in the house you can just imagine how much laundry I do every day. Â This detergent last me at least 4 to 5 months and my kids change clothes a LOT. Â All the ingredients together cost less than $20. Â I used to buy the large size of Tide or Gain at Sam’s club for about $25 and it only lasted me a month. Â So many fillers are added to commercial laundry soaps requiring you to use more detergent to get things clean. Â This stuff has NO FILLERS, it’s very concentrated and you use 1 to 1 1/2 Tablespoons per large load, I promise. Â I’m not kidding.
YES it gets my clothes clean.  Much cleaner than the store bought brands!  I put a white table cloth stained with red wine  in my washer with about 3/4 Tablespoon of this detergent and it came out without scrubbing or spraying with a stain remover.  I have removed similiar stains from my kids clothing and they have ALL come out.
I remember reading that this particular concoction was safe for front loading washing machines but since I don’t have one I can’t guarantee it. Â The website that I got this recipe from (which no longer exists or I would give her credit for this post) said that it was.
All of the ingredients needed for this soap can be easily found at Walmart or your local grocery store. Â Look in the detergent section. Â It’s all there. Â I found a pretty Glass container at Walmart for about $10. Â You will need something like a 4 to 5 Gallon container of some kind to store your detergent in.
If you feel that you have an extra stubborn stain and just don’t feel right about using this detergent only, add a little extra Borax to the load. Â I can all but guarantee the stain will come out.
Oh, and one more thing! Â Don’t be alarmed when you don’t see a lot of suds. Â The suds are that filler part I was telling you about. Â You WILL NOT see a lot of suds, but it IS cleaning your clothes, I can assure you.
What you need:
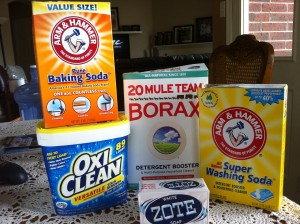
1 – 4 lb. box Arm & Hammer Baking Soda
1 Â – 55 oz. box All Natural Super Washing Soda
1 – 5 lb. box Oxi Clean Stain Remover
1 Â – 76 oz. box Borax
1 Â Bar of Zote Soap (grated)

After you have all of your ingredients, get a clean, empty kitchen sized garbage can, line it with a heavy duty garbage bag and dump all of your ingredients in. Â I take the garbage bag out and then roll it around on the floor to mix it. Â Kind of like a VERY large shake n bake bag.
Then  dump it in your container, store it in your laundry room and let the fun begin!
I would love to hear from you if you try this detergent! Â Please let me know what you think!
November 25th, 2012 § Comments Off on The BEST Jalapeño Corn Bread Ever! § permalink
I found a basic Corn Bread recipe, dressed it up and this is what I came up with. Â It is SO very good. Â The whole Kernel corn makes it extra good. Â Hope you enjoy!
Jalapeño Corn Bread
INGREDIENTS:
1 Cup Flour
1 TBL Baking Powder
½ tsp Salt
2 TBL Sugar
½ Cup Corn Meal
2 Eggs
¼ cup vegetable shortening (melted)
¼ cup whipping cream
¾ cup Milk
½ cup chopped onions
3 canned or fresh jalapeno peppers
1 cup frozen corn (thawed)
shortening for greasing the pan
Directions:
Preheat oven to 425F. Generously grease a large cast iron skillet. Place the skillet in the oven while it is preheating to get the grease sizzling hot.
Sift flour, baking powder, salt and sugar into a large bowl. With a fork, blend in the cornmeal. Add remaining ingredients to the bowl. Stir just until all ingredients are moist. DO NOT over mix.
Pour batter into the hot greased skillet.
Bake in oven until top springs back when pressed with finger, about 20 minutes.
Slice, add butter and serve.
September 4th, 2012 § Comments Off on Fried Okra § permalink
We grew a LOT of okra this year. Â We like okra, don’t get me wrong but dang! Â We got lots and lots. Â And we only like it fried. Â So I have frozen up a ton of okra this year, battered first and given lots of it away.
I’ve gotten request for the batter recipe so here it is. Â If you have lots of okra, batter it up, lay it flat on a cookie sheet in the freezer till frozen then transfer to large freezer bags. Â When your ready to fry it up, add it frozen to your heated oil and it’s ready in less than 10 minutes!
Ingredients
- 1/2 cup cornmeal
- 1 cup all-purpose flour
- Salt to taste
- Pepper to taste
- Garlic Powder to taste
- Dash of ground red pepper
- 2 pounds fresh okra, sliced 1/2-inch thick
- 1/2 cup buttermilk
- Oil for frying, about 2 inches deep
Directions
Heat oil in a large, heavy-bottomed skillet, electric skillet or Dutch oven to 350 degrees F.
In a medium bowl, combine cornmeal, flour and seasonings to taste. Soak okra in buttermilk and then dredge in cornmeal-flour mixture to coat. Â When I am doing large batches, I put the cornmeal mixture in a strainer (colander) and put the buttermilk soaked okra in the strainer and shake the cornmeal mixture out onto a plate till I just have only the battered okra in the strainer. Â Transfer to your oil or if freezing onto a cookie sheet. Â Repeat until all okra is coated.
Fry until golden brown. You may need to fry in batches, depending on how much you are making and how big your pan is. Â Fry okra in a single layer and turn often. Â Remove from oil, drain on paper towels, and then serve immediately.
August 21st, 2012 § Comments Off on Carrot Cake Cupcakes § permalink

By popular demand I am posting my carrot cake cupcake recipe. Â After reviewing and practicing with several recipes, I pulled all of the ingredients I loved and came up with my own. Â My Icing Recipe makes a lot of icing. Â That’s because I like to pipe the icing on in thick twirly layers. Â If you don’t like a lot of icing, cut the icing recipe by a third. Â You can also freeze these well, frosting and all. Â I’ve frozen them many times and pulled them out for special occasions. They are delish!
Ingredients
4 eggs
3/4 cup vegetable oil
1/2 cup apple sauce
3/4 cup white sugar
1 1/4 cup brown sugar
1 8-oz. can of crushed pineapple, well drained
2 teaspoons vanilla extract
1 cup all-purpose flour
1 cup King Arthur Whole Wheat Flour
2 teaspoons baking soda
2 teaspoons baking powder
1/2 teaspoon salt
2 teaspoons ground cinnamon
1/4 teaspoon ground nutmeg
Small pinch of ground cloves
3 cups grated carrots
1 1/2 cups chopped pecans or walnutsÂ
Directions:
Preheat oven to 350 degrees F.
In a small bowl, combine both flours, baking soda, baking powder, salt, cinnamon, nutmeg and cloves. Â Set aside.
In a large bowl, beat the eggs then add oil, apple sauce, sugars, pineapple and  vanilla.
Mix the flour mixture into the egg mixture until fully incorporated.
Stir in carrots.
Fold in pecans. Batter will be thick.
Pour into lined muffin tins. Â Fill each liner 3/4 full.
Bake in the preheated oven for 18-20 min.
Let cupcakes cool completely before frosting.
Store for 3 days in the refrigerator. Â For longer storage, cover well and place in the freezer for up to a month.
Cream Cheese Icing
Ingredients
3/4 cup butter, softened
12 oz. cream cheese, softened
5-6 cups confectioners’ sugar
1 1/2 teaspoon vanilla extract
In a medium bowl, cream together the  butter and cream cheese
Add vanilla.
Slowly, in 1/2 cup increments add the confectioners’ sugar.
Beat until the mixture is smooth and creamy. Â If icing is too thick, you can add a small amount of milk in increments to desired consistancey.
Ice fully cooled cupcakes. Â For a fancier frosting, put the icing in a pastry bag and pipe with decorating tips (Start at the outside diameter of the cupcake and work your way to the center.
July 27th, 2012 § Comments Off on Flour Tortillas § permalink

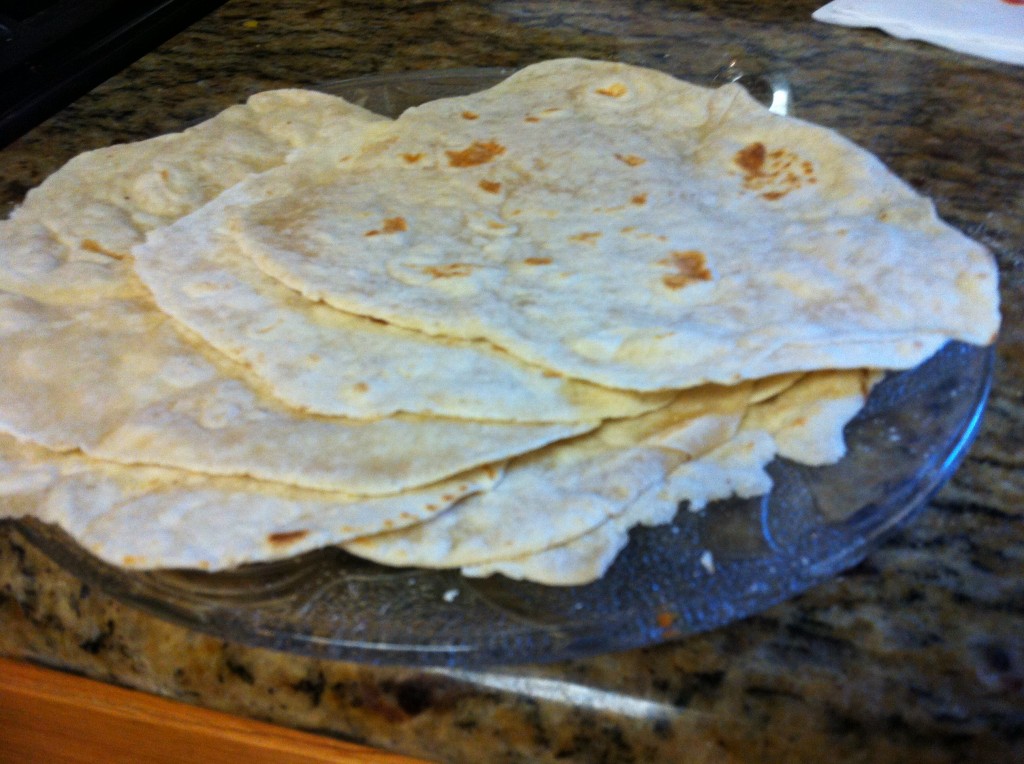
Oh. My. Goodness. Â These are SOOOO Good.
I was out of flour tortillas and my boys wanted some bean and cheese burritos. Â I Â really didn’t want to trudge out to the store to get any, so, on a whim I whipped out my best buddy, Google and searched for a recipe. Â I had tried making them a long time ago and they tasted like a floury piece of rubber. Not only that I remember them being a WHOLE lot of trouble. Â But Cameron’s big brown eyes were pleading so I thought, well I’ll just try it again.
I found this recipe from Chef John and only changed it a little.  They were super easy and tasted better than our favorite Mexican Restaurant’s tortillas. He suggests a tortilla press but I didn’t have one so so I used a rolling pin instead.  Mine were not perfect circles but they tasted so good no one cared.  I’ve made these a few times now and will NEVER EVER buy store bought ones again.
(Hint: Â I read that someone said you could take two cast iron skillets and press your tortillas that way. Â I haven’t tried it yet but I imagine it would be easier than using a rolling pin.)
Ingredients:
1 3/4 cups flour
3/4 tsp. salt
1/4 tsp baking powder
5 TBL vegetable shortening
1 cup warm water
Directions
Mix dry ingredients.
With a pastry cutter, grind the shortening into the flour mixture until it looks like a crumbly mixture.
Make a well in the center and add water.
Mix until you have a soft dough. Â Turn onto a floured work surface.
Kneed for about 3 minutes.
Put bowl over the dough and let it rest for 15 minutes.
Cut the dough into 8 equal pieces. Â Pull out the piece ou will be working with and cover the rest with the bowl.
Either use your tortilla press or roll out until very thin.
Heat a non stick skillet on medium high. Â Place your tortilla on the skillet and let cook on one side until it puffs up. Â Flip. Â Cook for a few more seconds on the second side.
Repeat with remaining dough.
Makes 8 flour tortillas.
I doubled this once and the tortillas turned out just as good. Â I may need to triple the recipe next time because when I made 16 they were gone in about 5 minutes! Â Hope you enjoy!


